Woodworking in America has come and gone. Maybe next year I will be able to attend.
We've had a lot of rain recently and the morning temperatures have dipped to the low 50's. That's not a bad thing for the most part, but for someone who enjoys sitting outside with a coffee and a laptop, it's getting a little cold. I can't help but wonder how the weather will affect my woodworking. The workbench is small enough that I can move it inside the RV, if necessary, but Mark's new house is big enough that I will be able to move into the basement this winter. I will even have my own fireplace! I don't want to get too comfortable there though, I still want to buy my own place. :D
For today, I think I will sit here and enjoy the sun.
A few of the RV projects (replace cracked bathtub, swap rotted air conditioner gasket) are done, but I still have a couple more big ones to tackle (replace broken slide out awning spring, replace toilet base seal). I'm mostly finished with my bench plane shelf, but decided to put it aside to get some of the RV projects done and the weather starts to cooperate. I did finish the moulding plane shelf last week and seen to get pulled away every time I sit down to write the blog. So, here it is...cold, but not forgotten....the Molding Plane Shelf!
I picked up the stock at a local BORG, not the most cost effective way to get what I needed, but they did carry oak and even had it available already milled to the thicknesses that I required. I still haven't braved my way into a hardwood lumber store and the BORG is only a two mile drive from my current location. Today, convenience wins. Besides, they had exactly what I needed.
Day One
First, I jointed the edges of two boards to allow me to glue them into one wider board. With them jointed at the same time, the minor imperfections are matched on both boards and the edge join together seamlessly. I thought about using a biscuit joiner to add a little extra stability to the shelf, but I decided not too, I'm too old school.
Using all the clamps I have, which is not nearly enough, I glued and clamped the two boards together. I used two scrap pieces to keep the boards flat and pinched the ends with small spring clamps. I also decided on this day that I needed to start picking up more clamps, I'm tired of always having to invent ways to clamp projects. lol
After the glue was dry, I gave it a quick going over with a card scraper to even out the joint. Looks great!
I easily squared up the ends using the shooting board.
I took it inside the RV where it will be positioned and drew the contours using a compass. I then began to work the wood down to final dimensions using my hand planes and rasps.
Here is a close up of where the shelf will meet the door frame.
Next, I glued a strip of 1/4 inch thick oak to the front as a lip. I rived this piece from a longer board, but the grain when all funny on me and didn't even know the meaning of the word "straight", so I won't be doing that again until I practice and get the break to cooperate with me.
Using bench planes and a moulding plane, I shaped the lip and added a nice curve to the bottom of the shelf.
Here it is after day one; dry fit with a few planes on it, very snug.
Day Two
I began the day by touching up the curve with a scraper, which is quickly becoming one of my favorite tools.
(Side note...I thought I would add a 90 degree slot to my shooting board to have it double up as a miter box. It's a good idea,....if you glued down your fence, which I hadn't. I ended up cutting right thorough it and had to glue on a new fence later. Another "way to go, Stupid" moment.)
I cut some small stock to use as anchor blocks. Why are they called 'anchor blocks'? Because I feel like it.
...and augured some 5/16 inch holes halfway through the blocks.
Using a recycled piece of the broken slide out awning spring, I cut some short lengths of rod.
Then, I glued down the strap anchors.
I decided to use pocket screws to hold the shelf in place, which is against my period philosophy but I gave myself a little leeway on this occasion since they didn't have RVs in the 18th century. I wanted to be certain that the shelf would stay in place during the hard and bumpy ride of a road trip.
Using a chisel, I rounded off the anchor blocks.
Finishing
Dewaxed shellac as a pore sealer...
A golden oak stain that closely matches the current color in the RV...
And two coats of wipe on polyurethane.
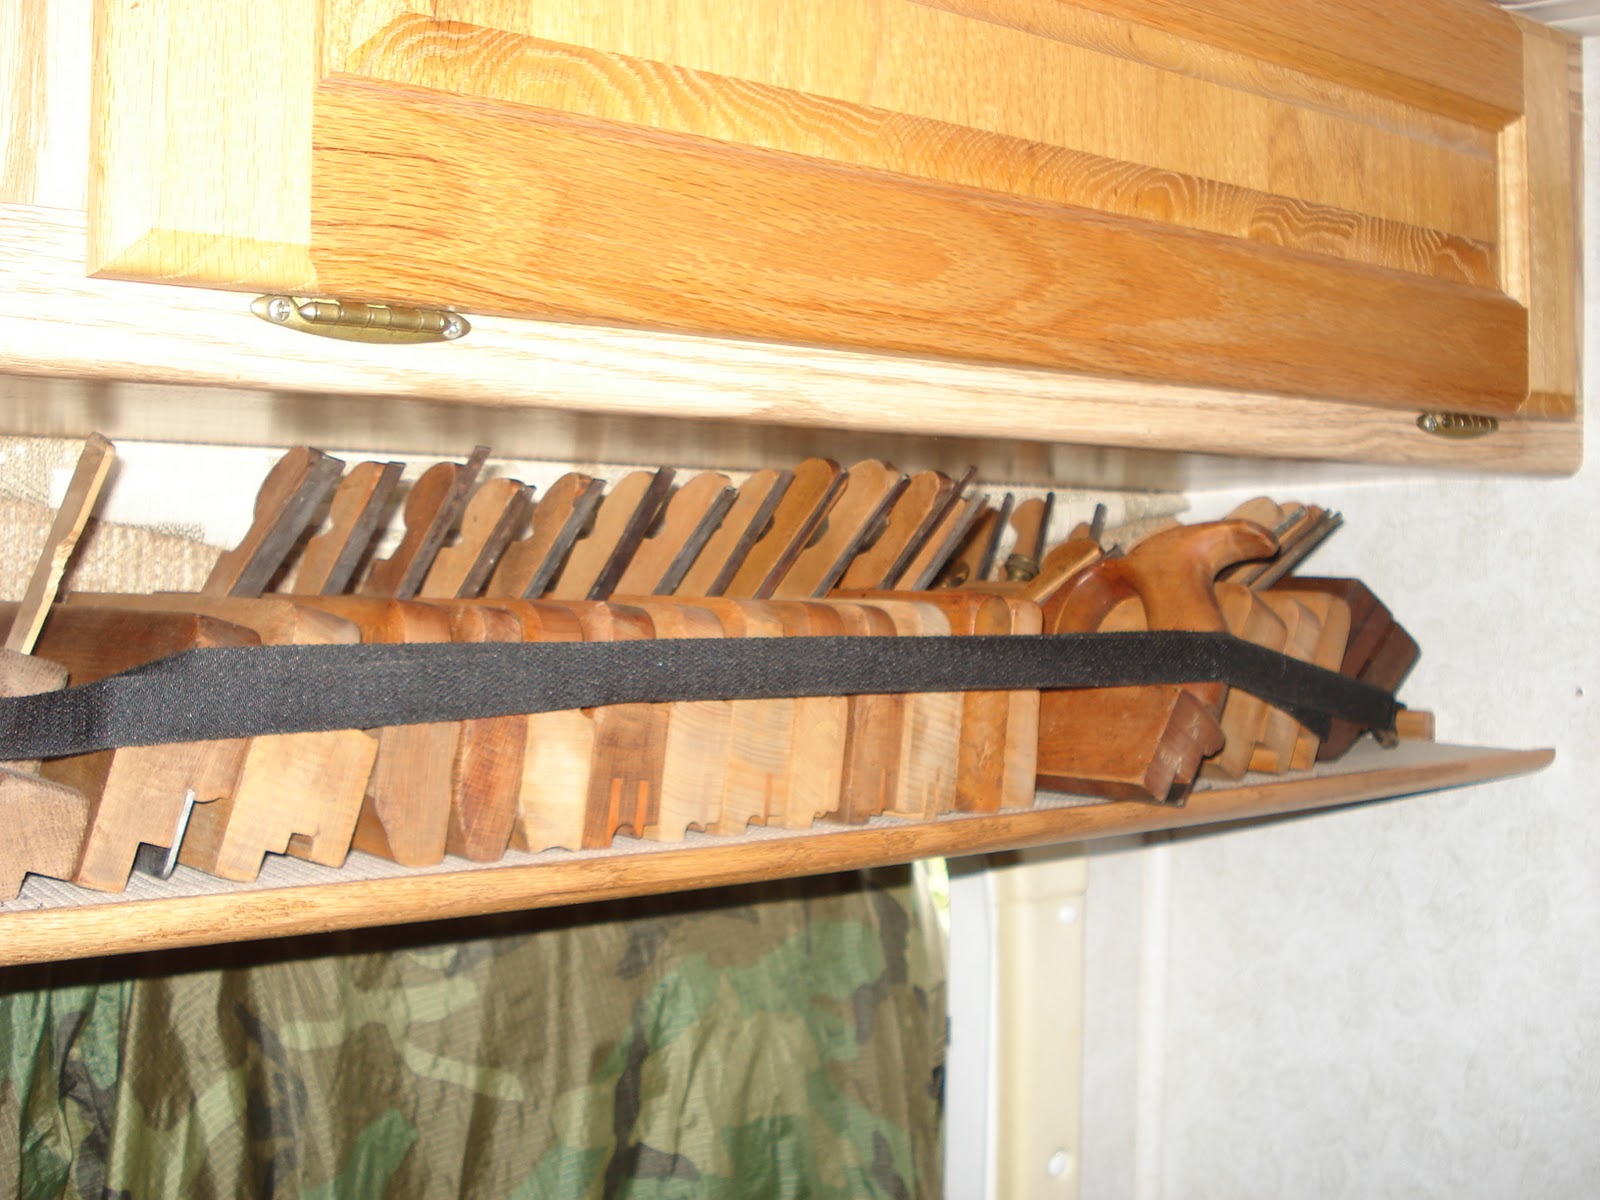
Here is the shelf mounted over the door using the pocket screws. The finish came out a little shinier than the current wooden components in the RV but the color is spot on. I have a finish restorer that I will be using on the current wooden components, which will hopefully bring the shine back to the same level as the moulding plane shelf. The few people that have seen it in person didn't even know what I added until I pointed it out to them, so it must be a good job. :D
The shelf holds 15 wooden planes that I had sitting packed in a box near the bed. Using Velcro straps, I can secure them all for travel. I may in the future make a drop down bar that would come down in front of the shelf, ensuring the planes would stay in place even more. I also placed a small mat on the shelf as padding and as a device to cover the pocket hole screws if anyone is tall enough to see them. The molding plane actually used on the shelf is the sixth one from the left. ;)
I'm very proud of my new shelf. :D
[Here are some better pictures of the finished project. I will probably end up moving the longest plane to the bench plane shelf when it is complete. The piece of camouflage you see here is actually some old military rain gear I was using to block some of the light coming in through the door.]
Next Project - Bench Planes Shelf