Showing posts with label Tools. Show all posts

Monday, March 30, 2020

A Clean Tool is a Happy Tool

Keeping your tools sharp and clean is very important in any shop, but even more so for the green woodworker. My task of modifying the birthing pen for the goat moms-to-be left me with some very sticky tools!

If you have dealt with pine pitch, which would even include anyone who has had to adjust the Christmas tree in the stand. You are familiar with the fact that it sticks to everything and even soap and water did little to clean it off. Simply put, pine pitch isn't soluble in water. 

To dissolve pine pitch you can use either alcohol or spirits (mineral or turpentine), either one does the job. I currently have about 2 gallons of denatured alcohol on that needs to be used, so that's what I grabbed. 

I also keep a can of used mineral spirits for paint clean-up that I would probably use normally. I do my clean-up and recycle it back into the can.

If you want to go "au natural", I suggest using spirits of turpentine or ether. Neither of these are not mechanically process and 100% safe to use. 

Finally, if you wish to learn more about the solubility of different gums and resins, I suggest picking up a copy of Shellac, Linseed Oil, and Paint; Traditional 19th Century Woodwork Finishes by Stephen A. Shephard. This was one of the books I used as a text during my years of teaching preservation. 


Cleaning with alcohol is a simple process; simply wet it down and brush it a little to help the alcohol dissolve the resins. 


After a few minutes, the resin will be completely dissolved and the alcohol will quickly evaporate, harmless to the finish of the tool. 


Another tool I had to clean was a drawknife I had used during a recent shaving horse build. I had planned to use green pine for the leg and pegs, but ultimately only used the pegs. I was sucessful, however, in making the drawknife all icky-sticky in the process. 


This is the auger bit I used during the goat pen chore. In the end, I switched to using wire nails, but if you read my earlier post, you already knew that. But as little as I used it, this auger still needed a cleaning. 

This is my number 7 bit that I always leave on one of my braces. I use it every spring to bore holes for my maple taps and also for any for drawbore holes at the bench. The old auger bits were numbered according to size, each to the sixteenth of an inch, thus this auger bit is equal to 7/16 inches 


After cleaning I like to give the tools a quick rub down with a linseed oil and beeswax mixture. There are many different mixture recipes out there, but there is really no wrong way to do it. I toss them in an old crockpot and cover the beeswax chuncks with lindseed oil. I like the mixture to be a little on the softer side, more oil than wax, so when it cools I will add more of one or the other to my liking. 


Clean-up is also when I give the tools a quick sharpening. Do yourself a favor and stop freaking out about how to sharpen. There is no secret to it, just learn a quick repeatable method and do it often. 


This is the hatchet after cleaning with the alcohol. 


And this is the hatchet after honing and oiling. I even oiled the leather cover this time. NICE!

You may not always have the opportunity to keep your tools in flawless condition. I sometimes have to leave to get things done ans saddly the tools have to wait on the bench until I get back. Do what you can, respect them, and they will last you many years, 

Dan. 

Friday, March 20, 2020

Tools be hanged!

I spent much of the last year in the new workshop procrastinating. It got so bad that I was constantly putting stuff in the workshop anywhere I could find room and no projects were completed because I always felt I needed to clean up first and it was a daunting task. The occasions that I did work in the shop, I would have to move this and that, knocking over a tower of tools in the process. Finally, my wife came to the rescue with logic allowing me to get past this depressing workshop era.

I can't quote her precisely, but it was along the lines of, "Take out everything you don't need. You don't need to get rid of it, store it in the attic until you figure out what to do with it." So that is precisely what I did.

I had house carpentry tools, roofing tool, blacksmith tools, and lots and lots of extra tools. So then began the great purge.

Most of the tools in the shop are now used on a daily basis. Mind you there is still plenty of room for improvement but as long as progress is made I am much happier.

One of the things I've been needing to do is organize my hand drills and hammers, which have been littering the mobile bench because I had no clue what to do with them. I don't find that I use the hand drills much, but I hope to change that in the future.

I have all these glorious ideas of hanging them using pegs and if I could only find the time to do it, I would be happy...but time tends to be a precious commodity of which we all lack. So I decided to hang them using finish nails for the time being, a more attractive solution may present itself later, or not. Whatever, it works for now.


I begin by eyeballing the approximate position I want the tool to be located. 


Measuring the gap gives me a span for the hanger, after adding a little extra so the tool isn't pinched, but not so much to all the tool to slide right through. There is not a lot of leeway on these hand drills. 


I mark the location for the nails and make an indention using a nail set. The nail set reduces the chance of your nail or drill bit riding away from the mark due to the hardness of the grain of the wood. I also predrilled a hole about 1/4-inch deep to guide the nail and reduce the hammering needed to set the nail in place.


I then copy the technique for the second drill. I had about six of them, so all the spares will be hung in the hallway leading to the shop as decoration. 


I follow a similar technique with all the hammers. I decided to keep three on hand in the workshop, all older. I've noticed that I tend to use the smallest on the most. My giant framing hammer has no use in the workshop so I set it aside for now. I plan to make a mobile work box for him and his friends later.

I drilled holes in the mallet handles and hung them in front of the drawshave. The smaller one is used on holdfasts and the other is a mortice chisel beater.


There, that definitely works for the time being! 

Dan.

Saturday, December 5, 2009

Vintage tools, they just plane crack me up

I think it's time that I introduced you to my Grandfather's tools, handed down to me from my Father. Some have always been favorites, others are soon to be the subject of future projects, and one, will be retired and will watch over the shop from its place of honor.


The meager number of tools shown above are: a Stanley No5 jack plane, 3 foot spirit level, drawknife, hand drill, and carpenter's square.

The square has a chunk missing out of the fence and the ruler is difficult to read. I may be able to clean it, but I'm not sure what to use and I'm afraid that I will end up loosing the measurements that are printed on it. I've got plenty of other squares of various shapes and sizes hanging all around the shop, but I continually find myself reaching for this old favorite that my Dad just recently handed down to me.

The level is missing the vertical tube, but that doesn't stop me from using it as much as possible, the horizontal tube and bubble work just fine. I don't have any plans to fix it or retire it just yet.


The hand drill and drawknife shown above have never been used by myself. I'm sure the drill only requires a bit of clean up and lubing, but the drawknife will need some tender, loving care. A couple new handles, some rust-busting, and a super sharpening. If lucky, this drawknife will be a happy, in-use drawknife.


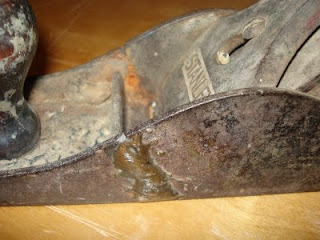
Sigh, the poor Stanley No. 5 jack plane. I removed the blade and sharpened it before realizing that the forward section of the plane had been welded, causing the plane to sit slightly nose up. I will ask my Dad the next time I see him, but most likely this plane will keep it's secret and retire, watching over the shop.


My final vintage tool, one not shown in the top most photo, in the grinding wheel. This grinder sat in my Dad's basement workshop all my life, and I remember turning the handle constantly just to hear it "WHIRRRRRRRrrrrrrrr", just as my Mom and her sibling's did it in my Grandfather's workshop when they were growing up. The wheel needs to be touched up but I still use it from time to time and the "whir" is just as exciting as ever.

I did have one more tool that was passed down, a saw. I'm not certain, but after some research I believe it was a crosscut saw, but stolen from storage while I was deployed to the Middle East.

Well, that's it. It's not a collection by any means, but each and every one of them is special. I do plan to add to my hand tool collection in the future, but these tools will always be the most important. Thanks for reading and I hope to see you all next time when I start talking about projects past.