
While it took Chris Schwarz only 3 hours to complete this project for the magazine, it took me about 3 days (most of that being lumber preparation and planing). My birdhouse is not quite the same as Chris's with slight modifications and personal preferences taken into account. (That 'should' be read as "mistaken measurements, unforeseen wood movement, poor stock selection, and infinitely less experience".) Built out of Cedar and much larger than I anticipated, I am still incredibly proud of this build. Enjoy.
Wedge and Tote Glue Up
Glue up already? Yup. The first step in making this bird house was to plane up two faces and glue some planks together so they can be shaped into the thicker wedge and tote later in the build.

I do not suggest using spring clamps for glue up. There are not strong enough and allowed my boards to cup from the moisture in the glue. This was a real pain to fix later.

A little flattening on the second set of boards prior to glue up...

...and another glue up. TIP: Use wax paper during your glue ups to avoid sticky messes on parts that aren't supposed to be glued.

Side Panel Shaping
The next step was to get the two sides to identical dimensions.First, I planed the stock flat using my Stanley #8. This beast roars through wood like 'butta' and left the surface perfectly flat in no time.

I then cut the sides roughly to the shape I desired, leaving them approximately 1/8 inch proud of the final dimensions.

To make the sides identical, I clamped them together in the face vise and finished shaping them with a block plane, rasp, files, and some sand paper wrapped around a small dowel. A spoke shave would have made this task go so much quicker and done a much better job, so I am adding it to my wish list along with some more clamps.

Here are the finished sides (and Josie in the doorway). Yes, they really are that big. The birdhouse is a whopping 35 inches across.

Cutter
With the sides shaped, and all the remaining pieces cut to size (3/4 inch thick, 5 inches wide, and cut to length), it was time to work on the cutter. The cutter needed to be 1/2 inch thick, which required me to resaw 1/4 inch from the board.

About 15 minutes later (including a cut thumb and mental designs of an upcoming project for a frame saw), the board is close to 1/2 inch. All that was needed was a quick planing to remove the saw marks.

I finished the cutter by trimming the upper corners and sharpening the bottom edge. I chose a nice piece of cedar that was a little darker and had an interesting grain pattern.

Tote
Now was the time to cut out and shape the tote (handle). This is also when I realized my boards cupped after glue-up and I decided that I really need a few more clamps. I decided to press on since the glue-up was solid in the middle of the board where the tote was to be cut from.
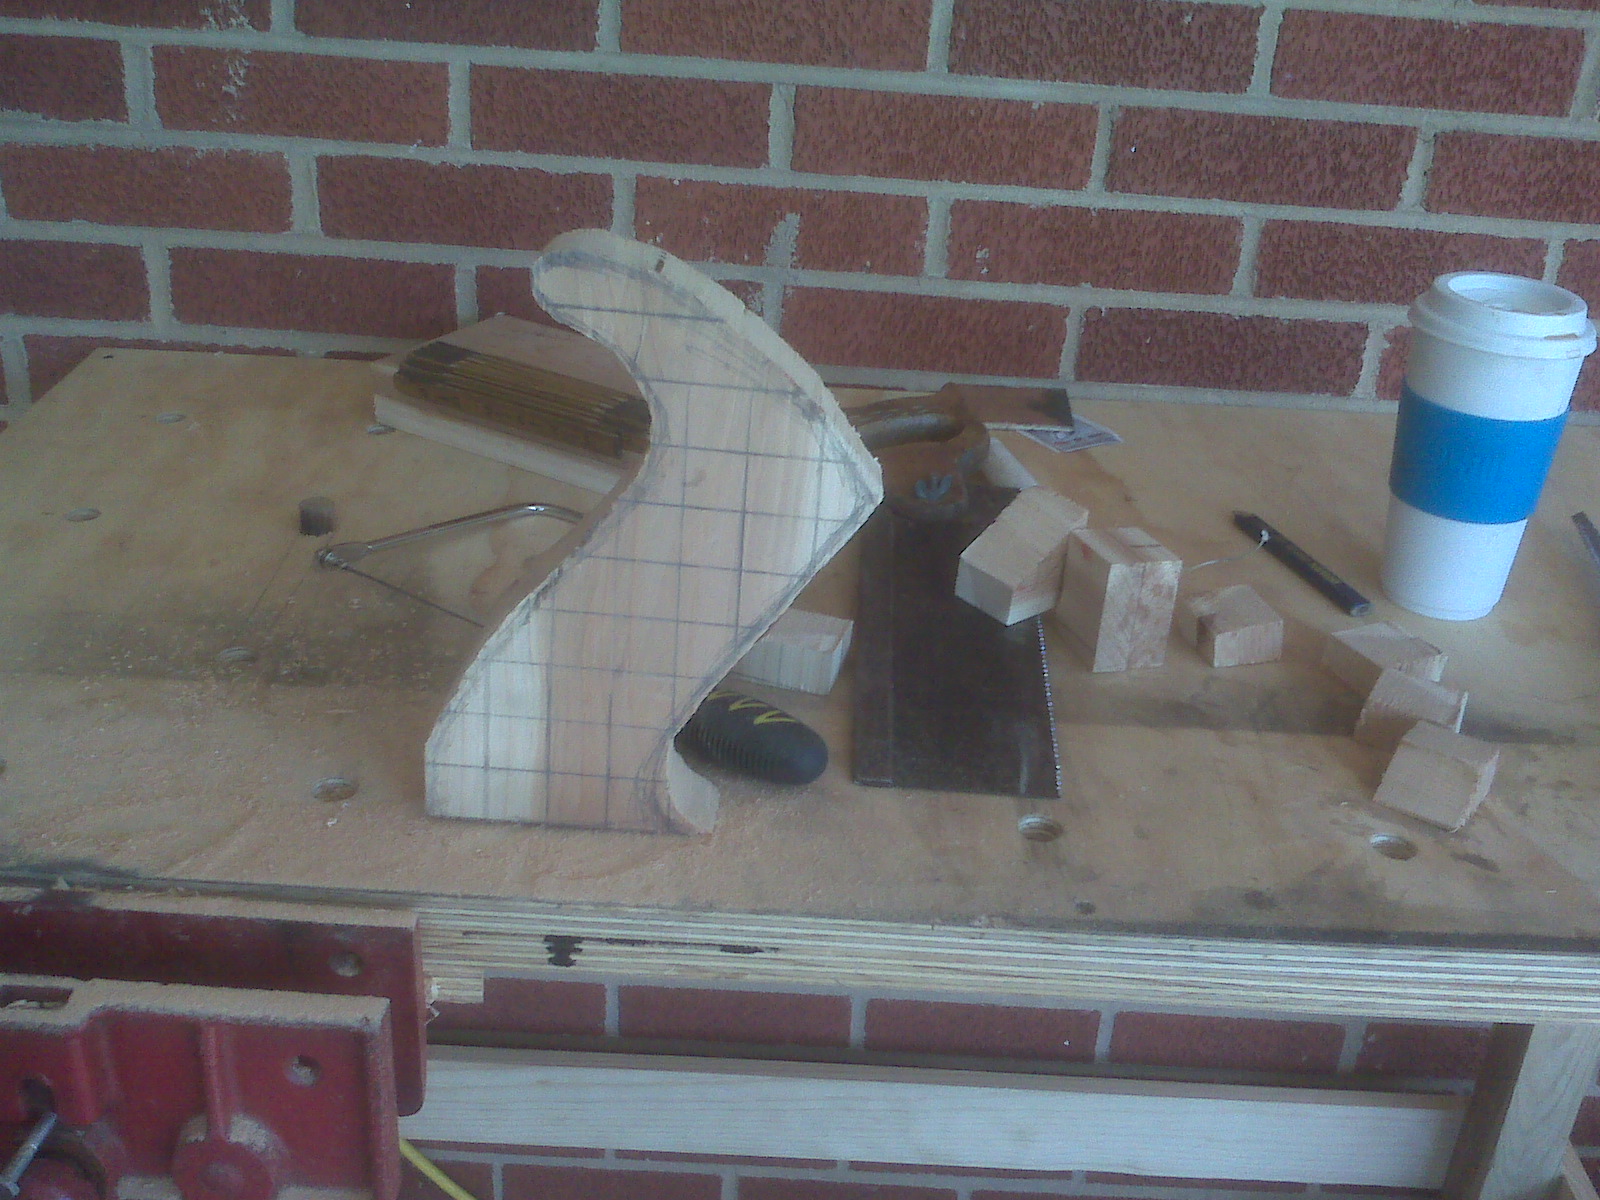
First, I drew some 1 inch squares on the stock and sketched the outline of the tote using the magazine plans and actual tote on my Stanley #4, which was sitting on the workbench in front of me. I then used the 1 inch markings to make some relief cuts for the coping saw. The coping saw could handle the curves with out the relief cuts, but I always feel more comfortable being able to take short breaks when I'm sawing lengthy cuts.

The lines of the tote were just a reference and I was willing to shape the tote to what pleased me at the time while I worked.

After the tote was cut out, I shaped it using a rasp, files, and some sanding. The cupped boards made little difference in the end product and it needed was a small amount of wood filler in order to smooth out the tote.
I then trimmed the end grain on the base to even it up. The smarter approach would have been to square up the sides and plane the end grain square using a shooting board. (Teaser...Next Project: Shooting Board!)

This is the tote prior to its final sanding.

Wedge
With the wedge stock glued up, I flattened and cut the stock to dimension, and then drew out the wedge.

I cut the end of the stock square as I felt was neccessary. I wasn't too worried about it being perfectly square since it would have to be reduced down to 3/16 inch thick at this point and would be mostly hidden inside the birdhouse.

Then, I cut the angels found on the top of the wedge.

Corners complete.

I used a Stanley #5 1/4 set with an aggressive cut to make the angled 'wedge'. Thinking back to the cutter, I could have used this technique instead of resawing....but on the plus side, I now have a small slice of cedar veneer available for future projects.

I planed it down close to the line in minutes, using my Stanley #4 to finish it.

With the angeled ramp-like section complete, I cut out the inside of the wedge.

Assembly
During the dry fit, I realized I had forgotten a divider on the inside of the birdhouse, This divider separated two of the housing areas for the birds and was very important to future tenants. A quick search through the scrap pile revealed some suitable stock and I quickly shaped a divider up and glued up the front side of the birdhouse.

Sanding Antics: I'm Batman!

The back side is removable in order to clean out the older nests on a yearly basis, so I clamped the birdhouse down, drilled some pilot holes, and screwed the back plate on.

Using an auger bit, I made some 1 inch entry holes. I didn't like these so I moved up to 1 1/4 inch holes using a rasp and sand paper since I don't yet own a 1 1/4 inch auger bit.

Some final shaving to fit with a block plane and some sanding completes the birdhouse. I didn't put any finish on it in order to allow the natural aromatic properties of the cedar to come through and cedar is also naturally weather resistant, ensuring the birdhouse is bird friendly.
I'm not sure where it will actually hang yet. Currently, it is stashed in the RV awaiting a more permanent location. I believe I will hanging it over the threshhold of my workshop when I buy my new house, because it is my first all hand tool project and I am very proud of it.

Next Project: Shooting Board
Actually, it was in Popular Woodworking, not Fine Woodworking.
ReplyDelete